Thursday, January 25, 2007
Saturday, January 20, 2007
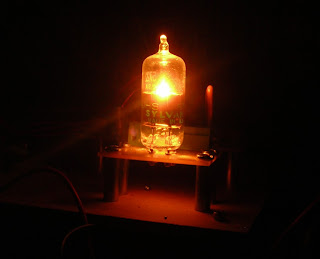
Characterizing the timing in the 8052.
My father is building a fly-back style switching power supply to power the post-ultor on our scope tube project. In order to characterize the magnetics he wants to have the switching controlled by a PWM at first.
The specs he gave me to produce are “a fixed on time at 10 uSeconds on, minimally 10 uS off, up to 1mS or more” so that he can start doing first order testing his protection diodes, etc.
In order to do this I have to characterize the timing of my 8051 boards timing. Aside from the LCD interfacing (which will be uploading soon) this is the first programming project I have done for “real time.” In order to do this, I will want to create delay routines, so I need to characterize my fundamental delay command: NOP.
Using my scope and frequency counter I wrote three assembly programs that flip P0 back and forth. While I could find out the length of a NOP with two cases I could not be sure that my counter wasn’t being fooled in the noisy digital environment.
LOOP:
SETB P0
NOP
CLR P0
SJMP LOOP
END

Measured period: 2.5 microseconds
LOOP:
SETB P0
NOP
CLR P0
NOP
SJMP LOOP
END

Measured period: 3 microseconds
LOOP:
SETB P0
NOP
NOP
CLR P0
NOP
NOP
SJMP LOOP
END

Measured period: 4 microseconds
Conclusion: NOP takes 0.5 microseconds
The specs he gave me to produce are “a fixed on time at 10 uSeconds on, minimally 10 uS off, up to 1mS or more” so that he can start doing first order testing his protection diodes, etc.
In order to do this I have to characterize the timing of my 8051 boards timing. Aside from the LCD interfacing (which will be uploading soon) this is the first programming project I have done for “real time.” In order to do this, I will want to create delay routines, so I need to characterize my fundamental delay command: NOP.
Using my scope and frequency counter I wrote three assembly programs that flip P0 back and forth. While I could find out the length of a NOP with two cases I could not be sure that my counter wasn’t being fooled in the noisy digital environment.
LOOP:
SETB P0
NOP
CLR P0
SJMP LOOP
END
Measured period: 2.5 microseconds
LOOP:
SETB P0
NOP
CLR P0
NOP
SJMP LOOP
END
Measured period: 3 microseconds
LOOP:
SETB P0
NOP
NOP
CLR P0
NOP
NOP
SJMP LOOP
END
Measured period: 4 microseconds
Conclusion: NOP takes 0.5 microseconds
An Analog Ammo-meter Box

This project involved mounting to Ammeters into a used army surplus 50 Caliber ammo box. This was done provide a secure home for the vintage panel mount meters and wound up looking very cool. Sitting by themselves the meters don't represent a finished usable tool because they are fragile and hard to work with. The ammo can is steel and has a rubber gasket on the lid. It makes a stable and sturdy home for the meters, "weaponizing" them, as it were. ;)
In order to mount the meters I bought a 2 and 1/4" holesaw from J & L Industrial supply for approximately $13.00 USD. The ammo box runs around $8.00 online and I took the banana jacks out of inventory.
I divided the side of the ammobox into thirds with a grease pen and mounted the meters halfway up the side. The mounting holes had to be cleaned up with a deburring tool, and once the meters fit snuggly inside, I used them as a template for the mounting screws. The single piece banana jacks are done by drilling two holes and filing the holes together to make the proper profile.

Then the only task was to connect the studs on the meters to the studs on the banana jacks. I did this with crimp connectors as you can see above. According to the pruduction standards set forth by my father, the connectors have been covered with heat shink. Two pieces are used, a little one that slips over the wire, and a larger piece that covers the connector. The little piece is used because if you try and make the larger piece shrink all the way down the wire it will tear itself on the connector.

Thursday, January 18, 2007
Subscribe to:
Posts (Atom)